Top 10 Ways to Fix a Faucet Handle?

Time:2026-10-17 Author:Ethan
0%

A loose faucet handle can turn a simple morning routine into a small, persistent frustration. Water may drip around the stem, the handle may wobble, or the tap may refuse to open fully. These symptoms often point to a worn screw, damaged cartridge, mineral buildup, or an improperly seated handle. Fixing Faucet Handle problems does not always require advanced tools, but it does require patience and careful observation.

Veteran plumbing educator Daniel Moore says, “A faucet handle usually tells you what it needs before you remove it; listen to the movement and inspect the leak.” This practical advice shapes the ten solutions in this guide. Each method focuses on a specific fault, from tightening a hidden set screw to replacing a stripped handle adapter. Small details matter. A flashlight can reveal corrosion beneath the cap. A towel can prevent scratches and catch loose parts. Shut off the water first.

Some repairs take minutes. Others expose deeper wear.

The guide also recognizes an uncomfortable truth: not every handle should be rescued. A cracked cartridge, frozen valve, or corroded mounting nut may require professional service. Forcing old hardware can damage the faucet body and create a larger leak. That mistake is easy to make. Therefore, these repair methods combine hands-on experience with cautious inspection. They are designed to help homeowners work safely, understand the cause, and decide when a licensed plumber is the wiser choice.
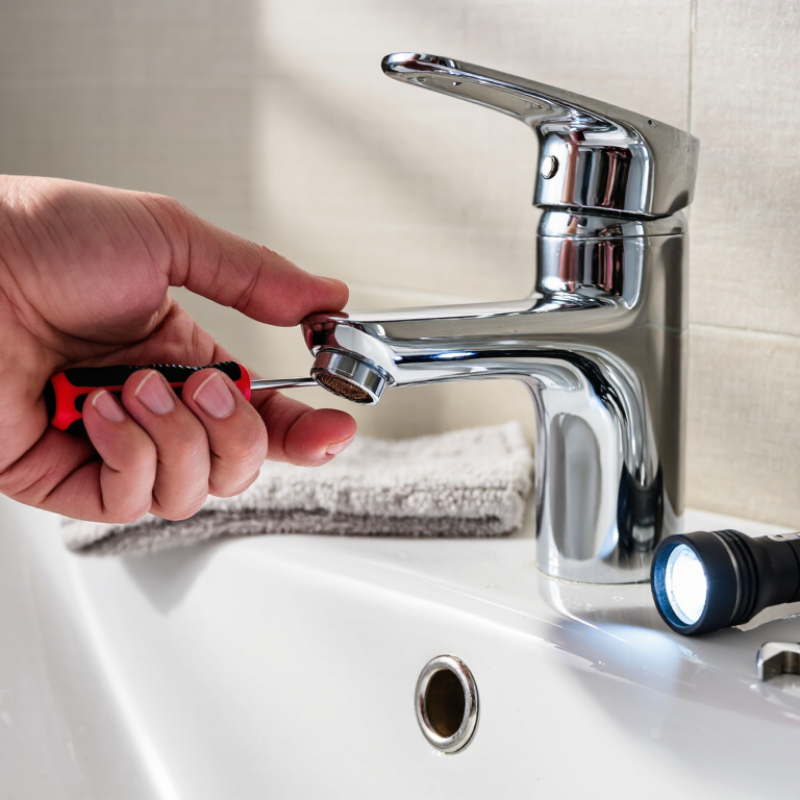
Top 10 Ways to Fix a Faucet Handle?

Identify the Faucet Handle Problem and Prepare the Required Tools

Before repairing a faucet, identify the exact handle problem. A handle that drips when closed often indicates a worn cartridge, valve, or washer. A loose handle may need a set screw tightened. Water around the handle base usually points to a damaged O-ring. Hard movement can suggest mineral buildup or internal corrosion. The U.S. Environmental Protection Agency’s WaterSense program reports that household leaks waste nearly 10,000 gallons of water per year. That makes early diagnosis practical, not cosmetic.

Shut off the local supply valves before removing anything. Open the faucet briefly to release pressure. Place a cloth over the drain and keep a small bucket underneath.

Prepare a flat-head screwdriver, Phillips screwdriver, adjustable wrench, hex key, flashlight, replacement cartridge or washer, and silicone plumber’s grease. Match the replacement part carefully. Similar-looking parts may differ in size.

I sometimes expect one worn seal to explain everything, but corrosion can damage the seating surface too. That possibility deserves a closer inspection.

Tips: Photograph each part before removal. Keep screws in a shallow tray. Do not force a stuck handle; gentle heat from warm water may help loosen mineral deposits. The U.S. Department of Energy notes that fixing leaks conserves water and reduces household utility waste. After reassembly, open the supply valve slowly and check the handle, spout, and base with a dry tissue. One small drip can return if the cartridge is misaligned.

Tighten Loose Screws, Caps, and Set-Screw Connections

A loose faucet handle usually points to a simple connection problem. Start by drying the area and placing a towel over the drain. This prevents dropped screws from disappearing. Start gently. Turn the handle and watch where movement begins. Is the cap shifting? Does the screw rotate? A small inspection saves time.

Many handles hide a screw beneath a colored cap. Lift it with a plastic pry tool, not a sharp blade. A metal blade can scratch the finish. Use the correct screwdriver and turn the screw clockwise. Tighten until the handle feels firm, then stop. Over-tightening can crack the cap or damage the threads. I learned this after treating “firm” like “immovable.” That was unnecessary. For a side set screw, insert the matching hex key fully. Keep it straight while tightening. A partly engaged key can round the screw head.

After tightening, test the handle through its full range. It should feel smooth, without wobbling or grinding. Refit the cap by pressing it evenly into place. If the screw spins without gripping, inspect the threads for corrosion or stripping. Replace the damaged fastener rather than forcing it. If the handle remains loose, the mounting sleeve, cartridge, or internal adapter may be worn. Tightening cannot repair a failed part. Shut off the water before deeper disassembly, and photograph each piece before removal. I sometimes skip that photo and regret it when parts look nearly identical.

Replace Worn Washers, O-Rings, Cartridges, or Valve Stems

A dripping faucet often needs a small part, not a complete replacement. EPA WaterSense reports that household leaks can waste more than 10,000 gallons of water yearly. The Water Research Foundation’s Residential End Uses of Water study also found leaks represented about 13.7% of indoor residential water use.

Turn off the supply valves and cover the drain before removing the handle. A worn rubber washer commonly causes a steady drip from a compression faucet. Remove the screw, lift the handle, and inspect the washer for flattening, cracks, or hardened edges. Match its size carefully. I have learned that “nearly identical” washers often fail quickly.

A damaged O-ring can make the handle feel loose or leak around its base. Apply plumber’s silicone grease, not petroleum jelly. Cartridge faucets need a compatible replacement cartridge, installed in the same orientation. Take a photograph before removal.

Valve-stem damage may require a new stem or seat, especially when the handle turns endlessly. Mineral deposits can hide the real defect. Clean them gently with vinegar, but avoid forcing brittle parts. That mistake is common.

Check the aerator, handle screw, retaining nut, and supply connection while the faucet is open. Tighten gradually. Excess force can crack fittings or distort seals.

If the leak continues after replacing a washer, O-ring, cartridge, or valve stem, the faucet body may be damaged. At that point, repeated part changes waste time and water. An experienced plumber can confirm the fault before unnecessary replacement.

Free Stuck Handles and Remove Mineral or Rust Buildup

Top 10 Ways to Fix a Faucet Handle

A stuck faucet handle usually reflects mineral scale, rust, or both. In my repair work, white, chalky crust often forms around the stem, while orange-brown stains signal corrosion. Hard water contains dissolved calcium and magnesium, according to the U.S. Geological Survey. These minerals can tighten small moving parts over time.

Shut off the supply valves first. Cover the drain. Then wrap a cloth soaked in white vinegar around the handle base for 30 to 60 minutes. Vinegar can soften mineral deposits, but it may not remove heavy rust. Scrub gently with an old toothbrush, not a sharp blade. A blade can scratch the finish and create another problem. Loosen the handle with steady pressure. Do not force it suddenly.

For stubborn buildup, remove the cap or retaining screw and inspect the stem. Apply a small amount of plumber-approved silicone lubricant to the moving surfaces. Avoid petroleum grease on rubber seals. If rust has weakened the screw, replace the corroded hardware instead of repeatedly twisting it. I once over-tightened a seized handle and damaged the cartridge. That mistake was avoidable.

The U.S. Environmental Protection Agency’s WaterSense program reports that household leaks can waste more than 10,000 gallons of water annually. A handle that will not close properly may contribute to that waste. Test the faucet after reassembly. Check underneath for slow drips, especially around the stem and supply connections.

Test the Repair and Prevent Future Faucet Handle Problems

After repairing a faucet handle, test it slowly rather than trusting a quick turn. Open the shutoff valve gradually and move the handle through its full range. Check whether water starts smoothly, stops completely, and changes temperature correctly. Place a dry paper towel around the handle base and supply connections. Even a small drip will leave a clear mark.

Run the faucet for two minutes, then close it firmly without forcing the handle. Wait ten minutes and inspect the towel again. Listen for faint hissing inside the cabinet. These details often reveal a loose cartridge, worn O-ring, or damaged washer. I have sometimes mistaken trapped water for a new leak, so drying every surface matters. A second test after several hours is more reliable.

Prevent future faucet handle problems by avoiding excessive force. The handle should not need tightening to stop normal dripping. Clean mineral deposits with a soft cloth and suitable household cleaner. Do not scratch the finish or use harsh chemicals near seals. Check the aerator occasionally, because restricted flow can encourage rough handle movement. If the handle remains stiff after cleaning, replace the worn internal part instead of repeatedly forcing it. A repair can look successful while hiding a slow leak, so periodic checks under the sink are worth the extra minute.

Top 10 Ways to Fix a Faucet Handle? - Test the Repair and Prevent Future Faucet Handle Problems

No. Faucet Handle Problem Recommended Fix Typical Tools Estimated Time How to Test the Repair Prevention Tip
1 Loose handle Tighten the visible set screw or mounting screw. Replace a stripped screw if necessary. Hex key or screwdriver 10–20 min Move the handle through its full range. It should feel firm without excessive resistance. Check the screw for tightness during routine cleaning, but avoid overtightening.
2 Handle is difficult to turn Clean mineral deposits around the handle and inspect the cartridge or valve stem for wear. Cloth, vinegar solution, wrench 20–45 min Turn the water on and off several times. The handle should operate smoothly and consistently. Wipe away standing water and scale before deposits harden.
3 Handle spins without controlling water Inspect the handle connection and replace a damaged adapter, stem, or cartridge when the internal splines are worn. Screwdriver, adjustable wrench 30–60 min Confirm that handle movement changes water flow and temperature normally. Use gentle, controlled force when operating the handle.
4 Water leaks around the handle Shut off the water supply, remove the handle, and replace the worn cartridge, stem seal, or O-ring. Wrench, replacement seals, cloth 45–90 min Dry the area, run the faucet, and check for moisture around the handle and trim. Replace deteriorated seals promptly to prevent cabinet or countertop damage.
5 Cracked or broken handle Replace the handle with a compatible part and transfer the retaining screw or cap if required. Screwdriver or hex key 15–30 min Check that the replacement handle sits securely and does not wobble during use. Avoid using the handle as a support or placing heavy objects against it.
6 Handle cap or cover is missing Install a compatible decorative cap to protect the retaining screw and improve the finished appearance. Small flat screwdriver 5–15 min Press or thread the cap into place and verify that it remains secure when the handle is used. Do not pry decorative covers with excessive force during cleaning.
7 Handle is misaligned Remove and reposition the handle so the off, cold, and hot positions align correctly with the valve. Screwdriver or hex key 15–30 min Check the shutoff position first, then test the full temperature range. Secure the handle before applying normal operating pressure.
8 Corroded or seized screw Apply penetrating lubricant, allow it to work, and use the correct-size tool. Replace the screw if damaged. Penetrating lubricant, driver, pliers 20–60 min Verify that the screw head is intact and the handle remains firmly attached after repeated use. Keep the handle area dry and replace corroded fasteners before failure.
9 Low or uneven water flow after repair Check that the supply valves are fully open and flush debris from the faucet aerator or cartridge. Pliers, cloth, small brush 15–30 min Compare flow from hot and cold sides and inspect for sputtering or restricted output. Clean the aerator periodically and flush plumbing after maintenance.
10 Handle problem returns after repair Recheck the water shutoff, handle alignment, fasteners, seals, and cartridge installation. Replace parts that remain worn. Basic hand tools, flashlight, cloth 30–90 min Perform several on/off cycles, inspect for leaks, and monitor the faucet for a few minutes. Use compatible replacement parts and avoid forcing components into position.

Safety note: Turn off the faucet’s water supply before removing any handle or internal component. If the shutoff valve will not close or a leak cannot be controlled, contact a qualified plumbing professional.

FAQS

What does a dripping faucet handle usually indicate?

It may indicate a worn cartridge, valve, or washer. A small drip can waste thousands of gallons yearly. Check the exact part before buying replacements.

Why does water collect around the handle base?

A damaged O-ring is a common cause. Dry the area with tissue, then watch for fresh moisture. Do not assume the cartridge is responsible.

What should I do before removing the handle?

Close the local supply valves. Open the faucet briefly to release pressure. Cover the drain and place a small bucket underneath.

Which tools are useful for a faucet handle repair?

Prepare screwdrivers, an adjustable wrench, a hex key, a flashlight, and silicone plumber’s grease. Keep screws in a shallow tray. Take photos before removing parts.

How can I loosen a handle covered with mineral buildup?

Wrap a cloth soaked in white vinegar around the base for 30 to 60 minutes. Scrub gently with an old toothbrush. Avoid sharp blades.

What if the handle remains stuck after cleaning?

Remove the cap or retaining screw and inspect the stem. Use steady pressure, not sudden force. Gentle warmth may help loosen deposits.

Which lubricant is safe for moving faucet parts?

Use a small amount of plumber-approved silicone lubricant. Avoid petroleum grease on rubber seals. Too much lubricant can also attract grime.

How can I check whether the repair worked?

Reopen the supply valve slowly. Test the handle and spout, then check the base and connections with dry tissue. One misaligned cartridge can bring the drip back.

What common repair mistake should I avoid?

Do not repeatedly twist a seized handle. Over-tightening can damage the cartridge or weaken a corroded screw. I once forced one too hard. That was avoidable.

Conclusion

Fixing Faucet Handle problems begins with identifying the handle type and the specific issue, such as looseness, dripping, stiffness, or difficulty turning. Before starting, shut off the water supply and gather basic tools, including a screwdriver, adjustable wrench, hex key, cloth, replacement parts, and a small cleaning brush. Check for loose screws, decorative caps, or set-screw connections, then tighten them carefully without damaging the finish. If the problem continues, inspect the washer, O-ring, cartridge, or valve stem for wear and replace the damaged component with a suitable part.

A stuck handle may need gentle movement and careful cleaning to remove mineral deposits, rust, or grime around the connection. Avoid forcing the handle, since excessive pressure can damage internal parts. After completing the repair, restore the water supply and test the handle for smooth operation, leaks, and proper temperature control. Regular cleaning, prompt attention to drips, and occasional inspection of connections can help prevent future faucet handle problems.

Ethan

Ethan

Ethan is a seasoned marketing professional with a deep expertise in our company's innovative product line. With a passion for sharing knowledge and insights, he takes the lead in regularly updating our corporate blog, where he explores industry trends, product features, and effective marketing......